
Summary: How to Use ?
Before the integration, you must be registered on app.capturefast.com and document type must be created first. Please click for details if you didn’t create a document type before.
After the document type creation go to the “Document types” section in app.capturefast.com and please click to “…” (3 dots) on your document type and select the “Edit Doc. type settings” and click to check “Skip verification” checkbox. Then click next button at the right bottom of the page.
Please click to “Destination” section at top of the page, at this page you must click on “Custom” icon in “Select your destination type” menu. Please click to see. Then click on next button.
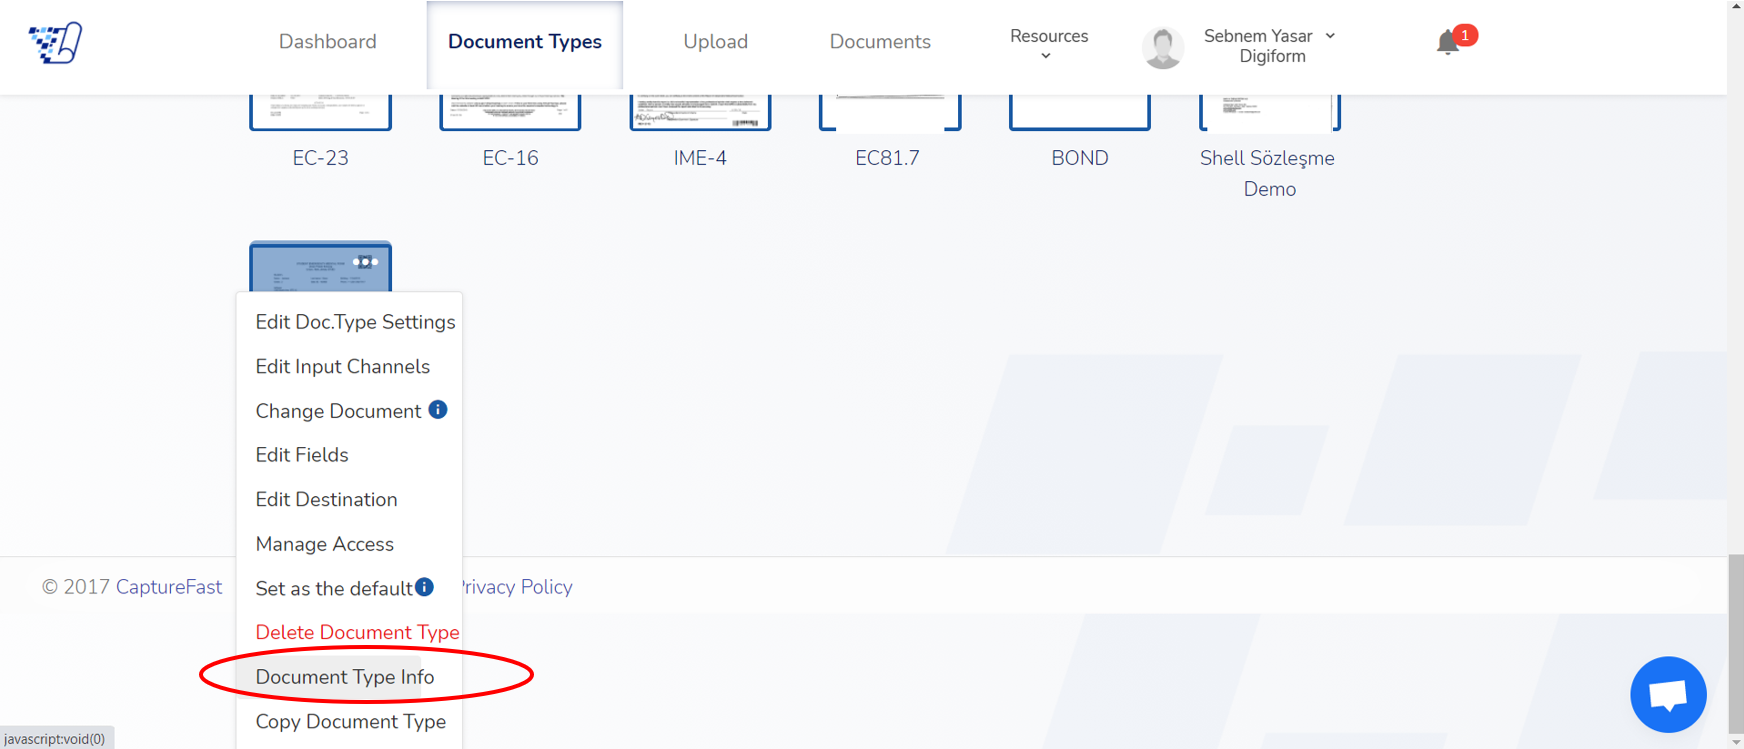
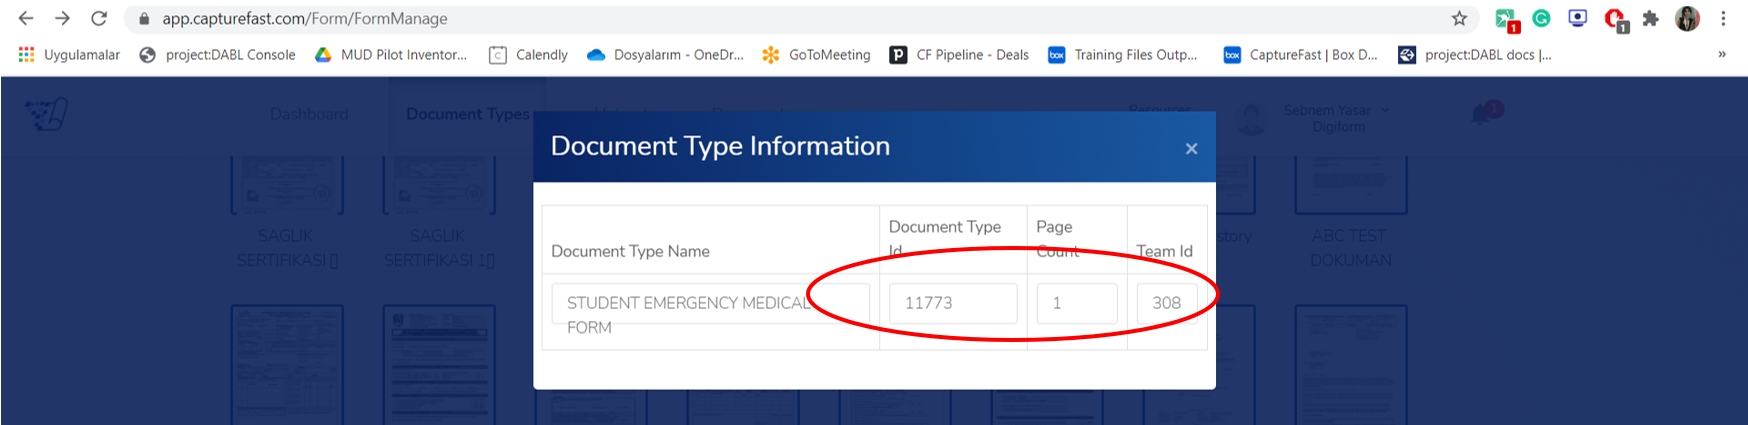
Go to the “Document types” section again, please click “…” (3 dots) on your document type and select the “Document type info” please note your “Document Type ID” and “Team Id”
ROBOCORP INTEGRATION
Step 1 – Library Implementation
Python Package Index (PyPi) link :ref: https://pypi.org/project/robotframework-capturefast/
Please create a new terminal in Robocorp Lab.

Then, install robotframework capturefast
Pip install robotframework-capturefast

Step 2
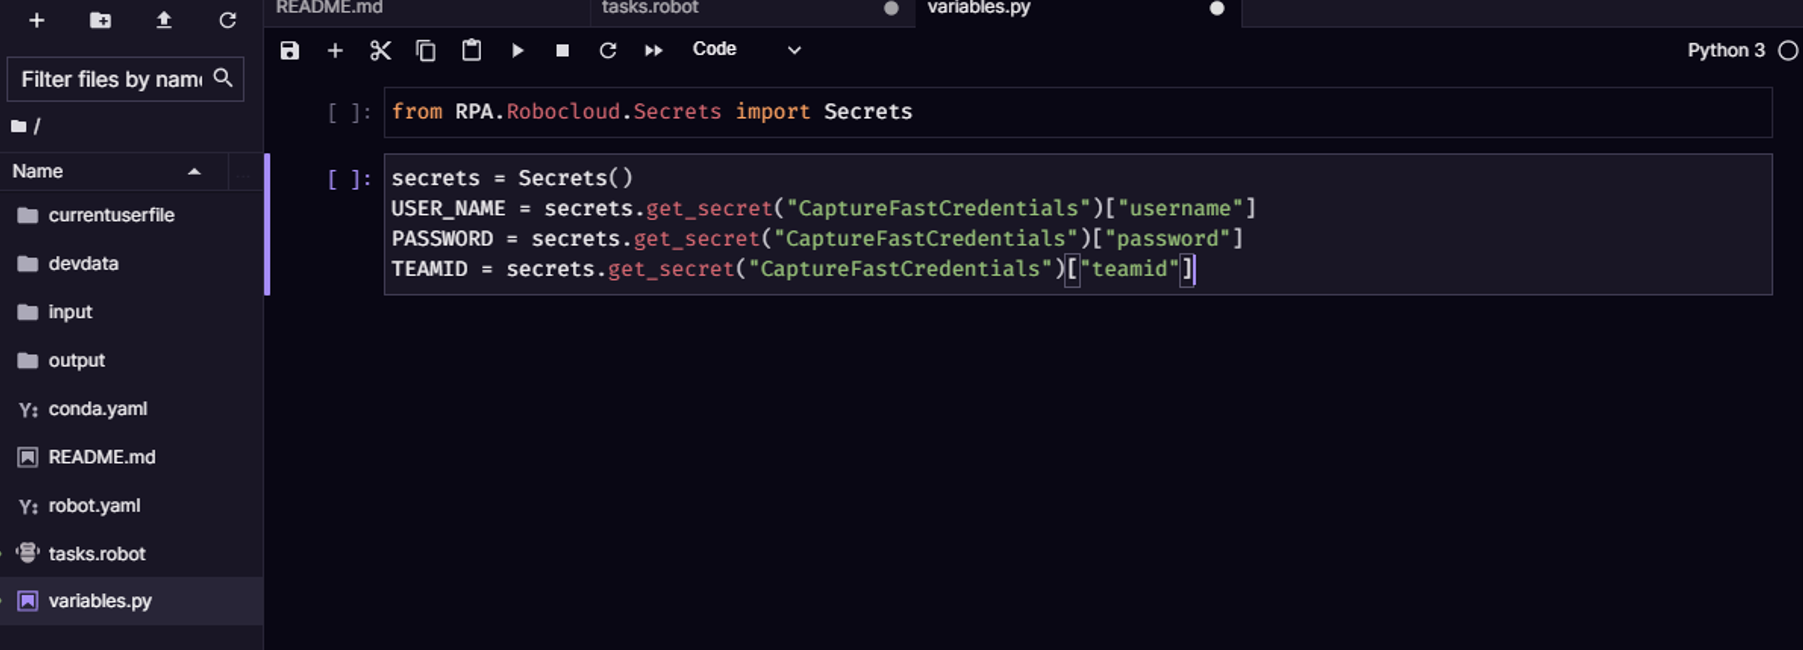
In order to use the Robocorp cloud a json file should be created by using the vault mechanism offered by Robocorp to provide authorization information.ref:https://robocorp.com/docs/development-howtos/variables-and-secrets/vault
In project, you need to create a folder named “devdata” and create a “env.json”. You should write the comment below into this json file.
{
{“RPA_SECRET_MANAGER”: “RPA.Robocloud.Secrets.FileSecrets”,
“RPA_SECRET_FILE”: “/Users/CurrentUser/vault.json”
}
Step 3
Go to the “RPA_SECRET_FILE” file, Its content should be as follows:
{
“CaptureFastCredentials”: {
“username”: “Please enter your CaptureFast user mail”,
“password”: “Please enter your CaptureFast password”
“teamid”: “Please write the Team ID please click to see”
}
}
The username, password and teamId taken from the Vault mechanism are transferred to variables in the Variable.py file and made ready for use.
We send the parameters we get to use the Capturefast library.

Step 4
The next process continues by using the “Upload Document” and “Get Document Data” functions in the library.
“Upload Document” returns a “Document ID” to send your document to CaptureFast and to track the status of your document.

To use the Upload Document function, the path of your file should be given as the 1st parameter and the ${document_type_id} as the 2nd parameter. By doing this, we ensure to get the results of the document that we defined in CaptureFast.
Step 5 – Get Document Data
Results can be retrieved with the help of using ${documentid} (that has been supplied in Upload Document function) as a parameter.

Finally, you can get the json results as shown in the sample below:
{
“DocumentName”:””,
“DocReferenceKey”:””,
“DocumentId”:0,
“TeamId”:0,
“TemplateId”:0,
“TemplateName”:”,
“DocumentTypeId”:0,
“DocumentTypeName”:””,
“CapturedUserId”:0,
“CapturedDate”:””,
“CapturedUser”:””,
“VerifiedUserId”:0,
“VerifiedDate”:,
“VerifiedUser”:,
“AdditionalData”:,
“Pages”:[
{
“PageId”:0,
“PageName”:”Page #1″,
“PageOrder”:1,
“OrginalFileName”:””,
“Fields”:[
{
“FieldName”:””,
“Value”:””,
“ConfidenceLevel”:100,
“Coordinate”:””
}
]
}
],
“ResultCode”:0,
“ResultMessage”:””
}
Leverage document capture with CaptureFast
Sign up to start. Then create your first document type. Finally, capture data from documents easily.